In this lesson Maya to Houdini conversion course you will be able to start creating particle collisions, adjusting colours, creating different instances of geometry onto your particle simulation and quickly and easily preview them in Houdini’s equivalent of a playblast.
In lesson 2c you will learn
- collisions
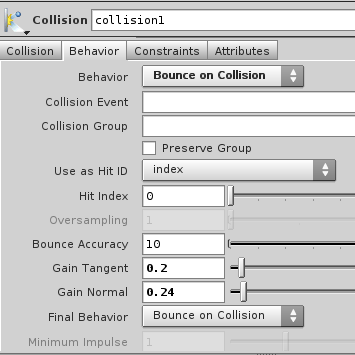
- how to set up a collision POP
- adjusting collision attributes
- Creating instanced Geometry
- Use a Copy SOP to set up instancing
- How to wire any geometry and particle simulation into a Copy SOP
- Colouring Particles
- Setting up a Playblast
- a playblast is called a Flipbook
- How to set Flipbook parameters
- How to use the Flipbook viewer
- The MPlayer is the equivalent of FCheck
- What MPlayer can do that FCheck can’t
The Full list of videos in the Maya to Houdini Conversion Course series here
Enjoy the lesson.
Please do use the share buttons to tell other artists who may be struggling with the switch across from Maya to Houdini.
Watch other videos in the Conversion Course series here
Why I created the Maya to Houdini Conversion Course?
I’ve been working as a VFX artist for over ten years, one of the most common questions people ask when moving across from Maya to Houdini is ‘how do I do xxxxxxx in Houdini, it’s so easy in Maya, but I can’t find the function in Houdini’.
Well the fact is that every software is different, not only do the functions have different names but different 3D software is built upon a whole architecture. To shift from Maya to Houdini requires to understand how the two pieces of software were built upon different architecture.
[Tweet “#Maya 2 #Houdini course pic.twitter.com/8D5N5FRcKh quick fast & #free –>”]




Leave a Reply