Naiad is an extremely powerful tool, here I’m going to share with you quick and easy ways to get started in Naiad fluid simulation.
Naiad test 01 – firing liquid against a wall
Naiad test 01 from Farhan Qureshi on Vimeo.
Naiad test 02 – a block crashing into liquid
Naiad Test 02: Block crashing into water from Farhan Qureshi on Vimeo.
Naiad test 03 – trudging through thick liquid
Naiad test 03: block trudging through thick fluid from Farhan Qureshi on Vimeo.
Naiad Test 04: Rigid body collision
So firstly I should say massive thanks and point you in the direction of two excellent training resources that will get you up to speed very quickly on learning Naiad
first is the excellent CMIVFX site who have an equally excellent Naiad training kit available here
http://www.cmivfx.com/tutorials/view/331/NAIAD+Simulating+Liquids+Volume+1
The other is a free one hour getting started tutorial from Exotic Matter themselves which you can find here
http://www.exoticmatter.com/naiad-training-videos/
After you manage to install Naiad which is no mean feat in itself then you need to learn how to build a graph. I won’t go into the graph building here as there are lots of other resources that will do that for you, but I’ll focus on controlling the fluids and some of the considerations you’ll need to take into account if you’re coming from a Maya or Houdini background.
So first if you’re used to Maya then this is going to be more difficult (Naiad is built on the same node based workflow as Houdini) , but it’s more a case of looking at it in a different way. Here you have to build and link each node individually to make a network – it may be the case later that these networks are compiled into a single button, much like Houdini now does.
I’ll attack the graph in stages so it’s not overwhelming
Setting up a particle and emitter
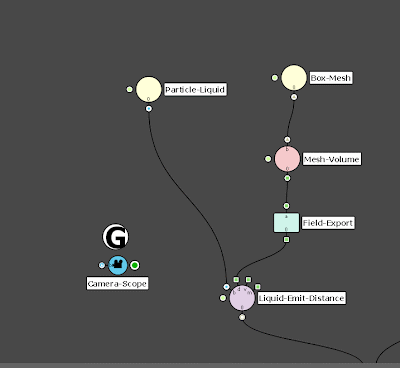
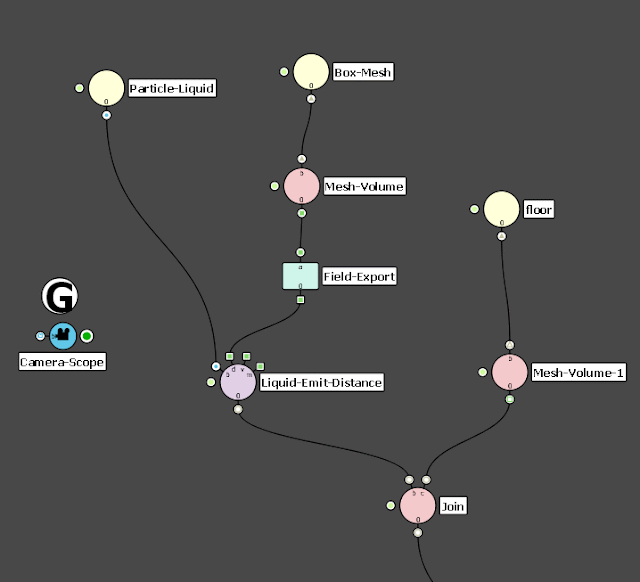
so the node at the bottom you can think of as an emitter. It needs two inputs the one on the left is the particle input, here you’d specify all the properties of a particle much as you would in Maya.
The branch on the right think of it as your emitter shape. Here I’ve set up a simple box shape. In order for the emitter to read that in it needs to go through a couple of extra nodes, first a MeshVolume which turns the Box_Mesh into a volume which is how Naiad interacts with particles. Next that volume is is exported through a Field-Export. Notice the circle and square shapes here. The emitter node has a number of input plugs which are also circular and square.
Circles are bodies and meshes, squares are fields.
Basic rule: circles plug into circles and squares plug into squares.
You’ll notice also a lage ‘G’ node and a camera scope – The ‘G’ node is the globals, it’s where you set your project preferences and the like, the camera scope allows you to visualise the 3d scene – more about scopes later.
Next we need to collide it – here I’m colliding it with the floor
Again same deal here, we need to turn that mesh into a volume. We then plug both of these into a ‘Join’ node.
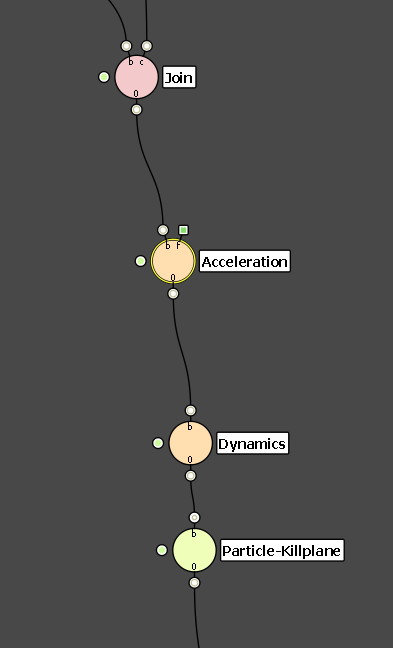
Add some gravity (which is a node called acceleration) and dynamics which will make trigger all these forces and collisions.
The join then goes into acceleration which by default is set to -9.81 in the y axis. You can of course change this.
The Dynamics node will make it all work.
I’ve put in a particle-Kill-Plane at the end. This will basically kill any particle below the level I place it at. You can of course change it to kill particles above a the kill plane if you wish. This will speed up the simulation time as you may not be interested in calculating particles that are outside of the bounds that you care about. There’s also a killmask that will allow you to define better the area you want to cull particles from.
Finally to output and view the simulation you will need an Emp-Terminal node with a scope attached to it.
Terminals come in two different flavours – an EmpTerminal will recursively write out every step (frame) to disc so you can scrub back and forth afterwards. A regular terminal will not and everything is held in RAM.
the scope here is a Particle-Scope, there are different scopes for different bodies. If you want to visualise a mesh you’ll need a mesh scope.
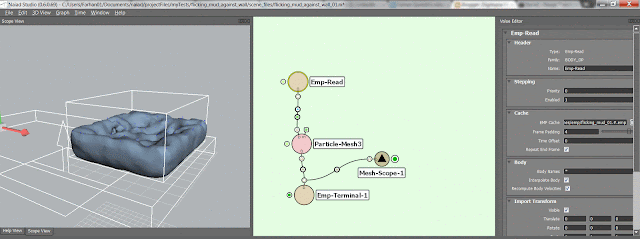
Once that’s all written out you’ll most likely want to visualise it as a mesh not a particle system.
You’ll need to set up three new nodes, either to the side in the same file or in a new file.
First you’ll need to read back in the particles that you wrote out, you do this with an Emp-Read node and point the directory to where you output the particles in your Emp_Terminal.
The Particle-Mesh3 node will then take those particles and mesh them out into a polygon for you to take back into your lighting pipeline.
The meshing parameters will help you make it smooth or rough.
Step through the graph again and it will write these out as .emp files for you to bring back into Maya/Houdini as you’d like.
Quick tip: to run through your scene faster use the left most button ‘Launch Naiad’ of the stepping buttons to step through the scene outside of the current instance of the programme.
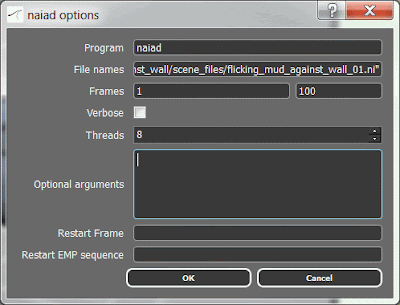
This will open up a new window where you can specify more threads to use – you can use them all and increase the processing speed.
You can choose to run Naiad on any file from here, so you don’t even need to have your file open. I’m sure various studios have this linked into the render farms so you could really speed up your sim time.
Here I’ve set it up to use all 8 threads that I have.
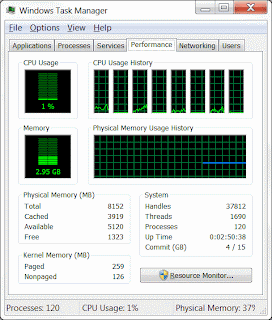
If you’re unsure of how many threads there are available on your machine just run the Task Manager and click on Performance, that will show you all the machine’s threads.
Hope this was useful in explaining how I got these sims done, for a more exhaustive explanation of all the nodes see the learning resources I gave at the top.
Thanks







Leave a Reply